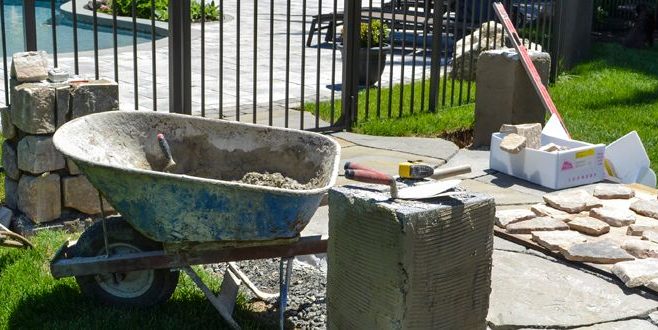
So you want to install a new paver patio – now what? Long-term project satisfaction depends on the quality of the work at the time of installation so it’s critical that you do things right.
Because we want to see you succeed with your endeavors, we’ve put together this step-by-step guide to handling a DIY patio paver installation with confidence and ease.
Step 1: Consider Intended Use
The first thing to ask yourself is how you plan to make use of your new paver patio. This is important because the pavers you select for the project may vary depending on whether you intend to use the patio as a poolside deck, a serene garden terrace or an outdoor cooking and dining area.
Step 2: Determine Patio Size
In order to figure out how much material you’ll require for your patio and how much work you’ll need to do on the excavation and paver laying process, you need to figure out the desired size of your new outdoor living space. Be sure to carefully measure the project’s coverage area to determine the square footage (length x width).
Most patio paver manufactures will specify how many pavers are needed per square foot which should enable you to accurately estimate how many pavers you’ll need to buy. It’s wise to purchase 10 extra to account for any incidentals or issues that arise.
Step 3: Mark the Perimeter
It’s a good idea to use stakes and twine as a means of marking off the perimeter of your project’s coverage area. This will help you to see how large the patio will be and how much space it will take up in relation to the remainder of the property.
At the same time, it will make you aware of any potential problems, such as the patio running too close to another landscaping or architectural feature. At this time we would also recommend that you call your utility company to assess you property and ensure that your project area won’t interfere with any underground pipes or cables.
Step 4: Excavate and Tamp
Excavation is likely the most labor-intensive step you’ll take when handling your DIY paver patio project. Most homeowners choose to use a shovel in order to excavate the area, but if you’re working with an exceptionally large project area you may want to consider renting special equipment.
Once the area has been cleared of dirt, you’ll also need to remove any rocks, roots, sticks or other debris in your way. Tamp and compact the ground thoroughly to create a solid base.
Step 5: Apply Landscaping Fabric
It’s very important that you spread a layer of landscaping fabric between the soil and the base of your paver patio. This will prevent grass, weeds and other plants from growing up through the paver’s joints and disrupting the appearance and strength of the patio.
It will also help to stop insects and pests from crawling up from the ground beneath your outdoor living space.
Step 6: Pour the Base
If you hope to install a DIY paver patio that will withstand the tests of time, you’ll need to make sure that you apply a solid, compact and reliable base.
A patio sub base can consist of crushed stone or quarry process. It must be firmly tamped down so that your pavers can be applied on a level surface that won’t shift, settle or move throughout the years.
Step 7: Install Edging
Choosing the right edging material for your patio is important. It’s often best to use a different type of material than the pavers for the remainder of the project.
Large, heavy stone, brick or concrete is a great choice as it will help to keep the entire patio in place while also creating a distinctive perimeter. This will also help you to better stay on track when laying down your patio pavers.
Step 8: Pour and Rake Sand
Sand is an essential component of installing a paver patio. The sand works to keep the pavers from slipping and sliding around. This ensures that you’ll have a firm and stable outdoor living space.
Be sure to pour the sand over the entire coverage area. Rake over the surface of the sand to ensure that the sand is uniformly distributed.
Step 9: Install Pavers
At last, we’re ready to start laying down the pavers for your new patio. In order to ensure that you don’t run into any problems with spacing or layout, we recommend that you start laying pavers down along the outside edge and continue to work your way inward.
As each paver is set into the sand, be sure that it is pushed in firmly so that it will hold its place. Take care to space your pavers evenly so that there are no joints that are much larger or smaller than others.
Step 10: Fill Joints
After you’ve laid the stones down onto your DIY paver patio, we recommend that you carefully inspect it to ensure that everything is exactly as you would like it to be. Once you have applied the adhesive to the stone’s joints, you won’t be able to make changes easily.
Only when you’ve concluded that you’re completely satisfied with the look of your patio should you apply the polymeric sand. The polymers that are blended into this sand will activate and harden when they are exposed to water.
Use a push broom to work the sand in between each joint until the joints are entirely full. Use a garden hose with a spray nozzle to moisten the sand and allow it to lock the pavers together.
Care and Maintenance
Once you’ve finished your DIY paver patio project, it’s important that you take steps to care for the finished project. We strongly urge you to apply a sealant to the pavers in order to further strengthen them and preserve their color and beauty.
In addition to this, you should plan on sweeping your patio on a regular basis. Be sure to sweep away any dirt, dust, grass, leaves and other debris as these can accumulate and create stains or issues with mold and mildew.
In the event that part of your patio does become stained, it’s wise to address these areas right away with a diluted solution of mild detergent and water.Finally, take steps to properly care for your patio during the winter months. Never use a metal shovel on patio pavers and consult with manufacturer specifications prior to using rock salt or ice melt.
Purchasing Patio Pavers in NJ
Braen Supply is your one stop shop for all of your DIY paver patio needs in NJ, NY and surrounding areas. We carry a massive inventory of patio pavers. Because we’re affiliated with the leading patio paver brands, we can provide our customers with the latest and best product offerings at the most competitive rates possible.
Sometimes installing pavers can be tricky and can become overwhelming, so its best to talk to a contractor or our staff to decide if installing them by yourself is really the best option. Our professional staff offers a wealth of knowledge about each of the products that we sell and are more than happy to answer questions, address concerns and offer up valuable advice. Feel free to pick up your pavers at your convenience or have them bulk delivered to your job site. We make deliveries throughout NJ, NY, PA and CT.


