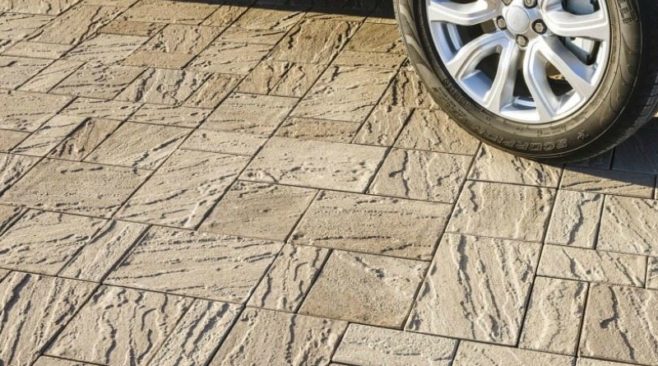
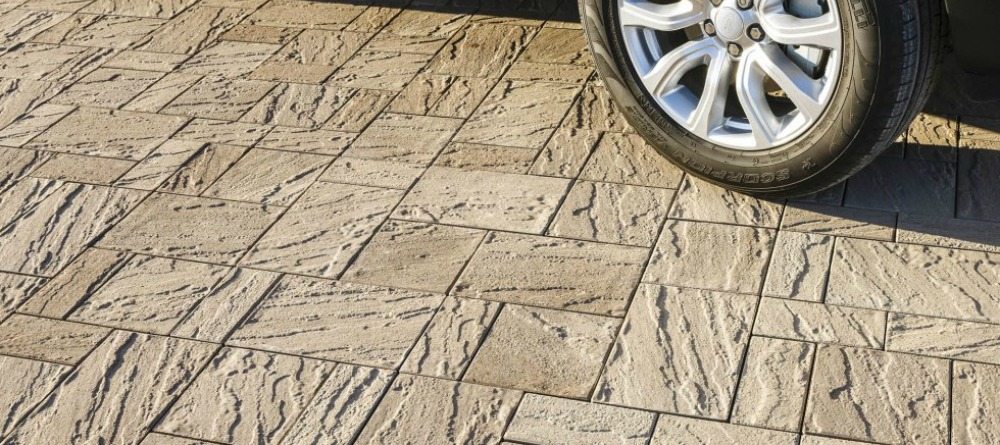
So you’ve fallen in love with the unique beauty of Techo-Bloc’s Eva pavers…now what? If you hope to get the most out of the paver’s stunning mix of flagstone and slate texturing, its rich colors and textures, its versatility and its longevity, you’re going to have to invest the time in proper product installation.
Regardless of whether you plan on tackling the project on your own or prefer to hire a professional contractor, it’s important that you understand what’s involved with the installation process so that you can feel confident that the work is properly completed.
The intent of this post is to equip you with expert tips and the knowledge required to pull off a flawless Eva paver installation that will serve your needs in the many years to come.
Prep Work for an Eva Paver Installation
Before you can actually move forward with the Eva paver installation process, you’ll need to take the time to do some careful planning. First, we strongly suggest that you work with your local utility provider to assess your land and ensure that your project area won’t interfere with any underground utilities.
Next, you should be aware that those who choose to work with Eva pavers will have 2 distinct options when it comes to establishing a design layout: linear or modular patterning.
Take the time to consider both options and discuss your ideas with a landscaping professional in order to ensure that you choose the right pattern for your home.
The Excavation Process
When being used in a residential setting, it’s recommended that you plan on excavating your project area to a minimum depth of 12″ (or 1′).
For maximum safety, structural integrity, and project longevity you’ll need to have enough space to introduce a 6″ layer of reliable sub base materials, a 4″ layer of base materials and a 2″ layer of a bedding material like sand.
Although it’s possible to excavate the area with a shovel and wheelbarrow, we typically advise homeowners to work with special excavation equipment in order to speed up the process. After digging up the earth, you’ll need to compact the soil and remove any sticks, large rocks, weeds, roots, or debris.
Drainage and Weed Prevention
It’s very important to be proactive when it comes to preventing the possibility of future problems with excess water and/or weeds. No matter how flawless the initial Eva paver installation actually is, all of your efforts can be deterred by drainage issues or the growth of unwanted weeds and plants up from beneath the pavers.
Fortunately, both of these problems can be deterred well before they begin. We urge you to work with a trusted professional to determine the degree of drainage required for your property and to lay down piping for this purpose prior to pouring your sub base.
Next, you’ll need to apply a layer of geotextile or landscaping fabric over the “floor” and “walls” of the excavated area. This will stop weeds from growing up through the sub base and base and eventually through the joints of your pavers.
Pouring a Base and Bedding
The next step is to introduce your sub base, base and bedding materials to the excavated area. A good sub base material will be large and heavy and will provide excellent strength for the entire project area.
The base layer will then be comprised of slightly smaller crushed aggregate materials. Be sure to pour an even layer of materials, and compact thoroughly prior to introducing the next layer of materials.
A good rule of thumb is to establish a 6″ sub base layer followed by a 4″ base layer. Finally, your sand or bedding material will be poured on the top. Here, a 2″ layer is required for best results.
The Eva Paver Installation Process
When laying pavers on top of the bedding, you’ll need to exercise care and precision in order to ensure that the correct pattern is followed. These patterns are designed for beauty and strength, so sticking to the plan is of the utmost importance.
When working on a slope, it’s best to start at the bottom and work your way uphill. It’s also a good idea, in all circumstances, to work from the outside edge of the project area, inward.
For driveways, you’ll enjoy more paver strength when pavers are laid perpendicular to the direction of traffic. Be sure to fill all paver joints with ample amounts of filler like polymeric sand, and wet the sand thoroughly in order to activate the polymers to allow for proper hardening.
Finishing Touches
If any polymeric sand or other joint-filling material is left on the surface of your Eva pavers, they could harden and create a tough, sticky mess that’s difficult to clean up and that could detract from the beauty of your completed project.
It’s wise, then, to immediately take the time to sweep any excess sand off and away from the newly installed pavers. Although Eva pavers are strong and durable on their own, you might want to consider sealing the pavers in order to offer further protection.
Talk to a professional about which sealant is right for your pavers, and keep in mind that you’ll need to re-seal the area every 2 years.
Aftercare and Maintenance
Eva paver aftercare and maintenance is just as important is the Eva paver installation process. Techo-Bloc offers a lifetime warranty on its products for any natural deterioration, but failing to do your part to take care of the pavers could void the warranty.
We suggest that you establish a routine for sweeping your pavers in order to remove dust, leaves, grass and debris. Allowing this stuff to build up could eventually lead to problems with mold, mildew and staining. In the event that stains do occur, they can be treated with a solution of water and mild dish detergent.
Simply apply the solution and gently scrub the affected area with a soft cloth. When it comes to winter maintenance, you should be aware that Eva pavers are designed to be resistant to deicing salts which means that you won’t have to worry about corrosion or damage as a result of taking safety precautions throughout the winter months.
We do recommend that you try to avoid using a shovel to remove snow on top of your pavers, though, as a means of avoiding any scraping or chipping.
Handling an Eva Paver Installation in NJ
If you’re excited about moving forward with plans for an Eva paver installation, a visit to Braen Supply is your next step. As the most trusted Techo-Bloc dealer in NJ, we offer a full inventory of stunning concrete pavers, including Eva pavers in a range of colors.
Our team is knowledgeable about Eva pavers and the Eva paver installation process and can provide you with valuable tips and information on product selection, installation and maintenance.
We always offer the fairest and most competitive prices on our Techo-Bloc materials so that you can complete your project on a budget you can afford. Our Techo-Bloc products can be picked up at your convenience or can be bulk delivered to job sites throughout parts of NJ, NY, NYC and PA.