If you’re tired of your Rockland County home looking like all the rest on your block, you may be giving some thought to overhauling your landscape this spring. Before you make plans to bring out the wrecking ball and starting completely from scratch, though, you should know that there’s an easier way: installing patio pavers.
Introducing these pavers to your property is a fast, simple, affordable and practical way to upgrade your property and make better use of your outdoor living space – without any of the hassle.
Ready to get started? This post will walk you through the basics of how to install patio pavers so that you enjoy smooth sailing throughout the construction process.
Why do I need to learn how to install patio pavers?
Homeowners who are planning on leaving the actual work of installing patio pavers to a professional contractor may wonder why they actually need to know how to get the job done. Regardless of whether you’re going to tackle the project on your own or work with a contractor, though, it’s important to understand the steps that should be taken for a reliable installation.
Cutting corners or skipping certain steps could come back to haunt you in a big way – and in a very short period of time. Knowing exactly what needs to be done will ensure that the job gets done right the first time around so that you don’t have to waste time and money making major repairs down the road.
How to Install Patio Pavers: Your Step-by-Step Guide
Before proceeding anything further, let’s take a look at the tools and materials required in order to get the job done right:
- Yard stakes
- Twine
- Shovel/spade
- Wheelbarrow
- Gloves
- Tamping tool
- Hoe
- Landscaping fabric
- Crushed stone
- Sand
- Pavers
- Push broom
- Polymeric sand
- Hose with spray nozzle
Once you’ve assembled your tools, you’re ready to learn how to install patio pavers. Adhering to the following steps will make the process as seamless as possible:
Step 1: Have Your Property Assessed
We always recommend that our customers contact their local utility provider and schedule a one time property assessment. During the visit, an expert will determine where any underground piping, cabling or wiring may be located which could prevent you from excavating and constructing a patio in these specific areas.
This assessment can play a key role in determining how large or small your patio will need to be as well as in establishing the types of layouts that are most practical for your property.
Step 2: Plan a Layout and Mark the Perimeter
Now that you know what you’re up against, you’re ready to sit down and decide where you want your new patio to be located and how you want it to be laid out. Will you construct a rectangular surface or are you more interested in a circular or wavy patio? Once you’ve made a decision, work with a partner to mark off the desired boundaries with stakes and twine.
Step 3: Excavate the Area
Depending on the size of your patio, you may be able to excavate the project area with a shovel and wheelbarrow or you may need to rent special equipment. In either case, we suggest that you consult with a professional to determine how deep you’ll need to dig out the area for your patio.
Step 4: Prepare the Base
A stable base is an absolute must for any paver patio. To ensure that the patio will be well supported you’ll need to remove any roots, large stones, sticks or other debris from the excavated area before compacting it down firmly.
Finally, you should apply a layer of landscaping fabric. This will prevent plants from growing up underneath the pavers and displacing them.
Step 5: Pour Base Materials
A solid and reliable sub base material like crushed stone or quarry process is critical to ensuring that your patio will be solid and long-lasting. Carefully pour these materials to the necessary depth and compact them firmly before proceeding.
Step 6: Install Edging Material
Before you introduce sand to your project area and start laying pavers, we suggest that you start by laying down your edging materials. This will help prevent the sand from becoming scattered throughout your property and will help you to stay on track when laying down the pavers.
Some homeowners choose to use the same pavers for both the patio and the edging whereas others utilize stones that will contrast nicely against the remaining pavers and create a clear boundary.
Step 7: Pour Sand
From here, you’re ready to pour your sand over the entire project area. Be sure to rake it out smoothly so that it is evenly distributed throughout the patio. It’s wise to talk to a trusted professional to determine exactly how much sand you should purchase and apply in order to achieve optimal results.
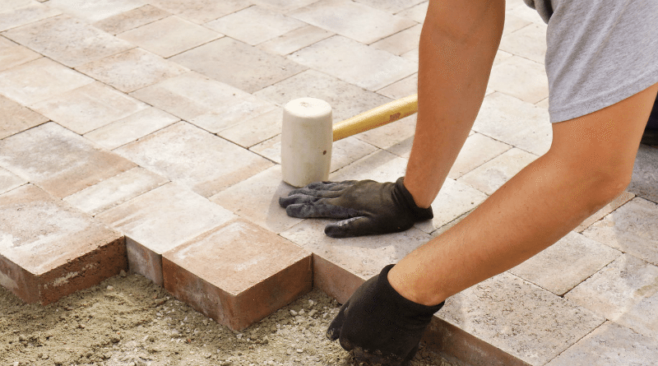
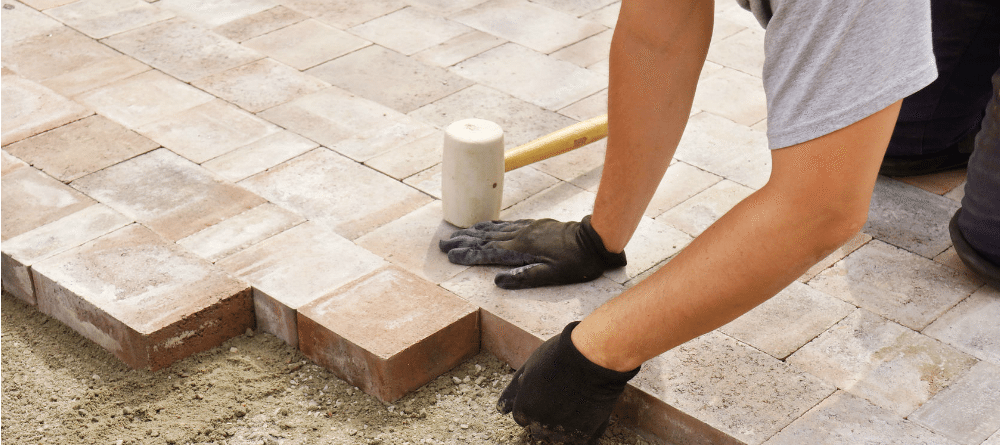
Step 8: Lay Down Your Pavers
Working from the outside edge inward you will carefully lay each paver down into the desired area and press it firmly into the sand. Make sure that you space the pavers evenly from one another and press them to the same depth so that the entire surface is even and level.
Step 9: Fill the Joints with Polymeric Sand
After you’ve laid the pavers down to your satisfaction you need to make sure they get locked into place with an adhesive materials such as polymeric sand. This is a blend of sand and polymers that harden when they are exposed to water.
Use a push broom to fill each joint with the sand, ensuring that every crack is filled to an even depth. Then simply use a hose to spray over the pavers and allow the polymers to work their magic.
Step 10: Sweep and Enjoy
After the patio has dried, it’s a good idea to sweep over the entire surface and remove any extra debris that may be scattered across the surface. This will prevent debris and residue from beginning to build up on your newly constructed patio.
In addition to learning how to install patio pavers, we would suggest that you take a few moments to learn about the process of sealcoating the paver patio. This will help to preserve the beauty of the patio while improving the strength and durability of the pavers.
Be sure to wash your patio pavers regularly and address stains immediately with a diluted solution of mild detergent and water. Make sure to discuss winter care with a trusted professional and follow all manufacturer specifications regarding ice melt and rock salt.
Where to Buy Patio Pavers in Rockland County, NY
Rockland County residents know that they can count on Braen Supply to meet all of their patio paver needs. We carry a massive inventory of high quality pavers from all of the leading manufacturers.
Our staff are knowledgeable and can answer all of your questions regarding how to install patio pavers and can provide you with useful information about the pavers themselves.
Our pavers are available at the fairest and most competitive prices and can be picked up or bulk delivered to locations throughout Rockland County as well as all of NJ, NY, PA and CT.