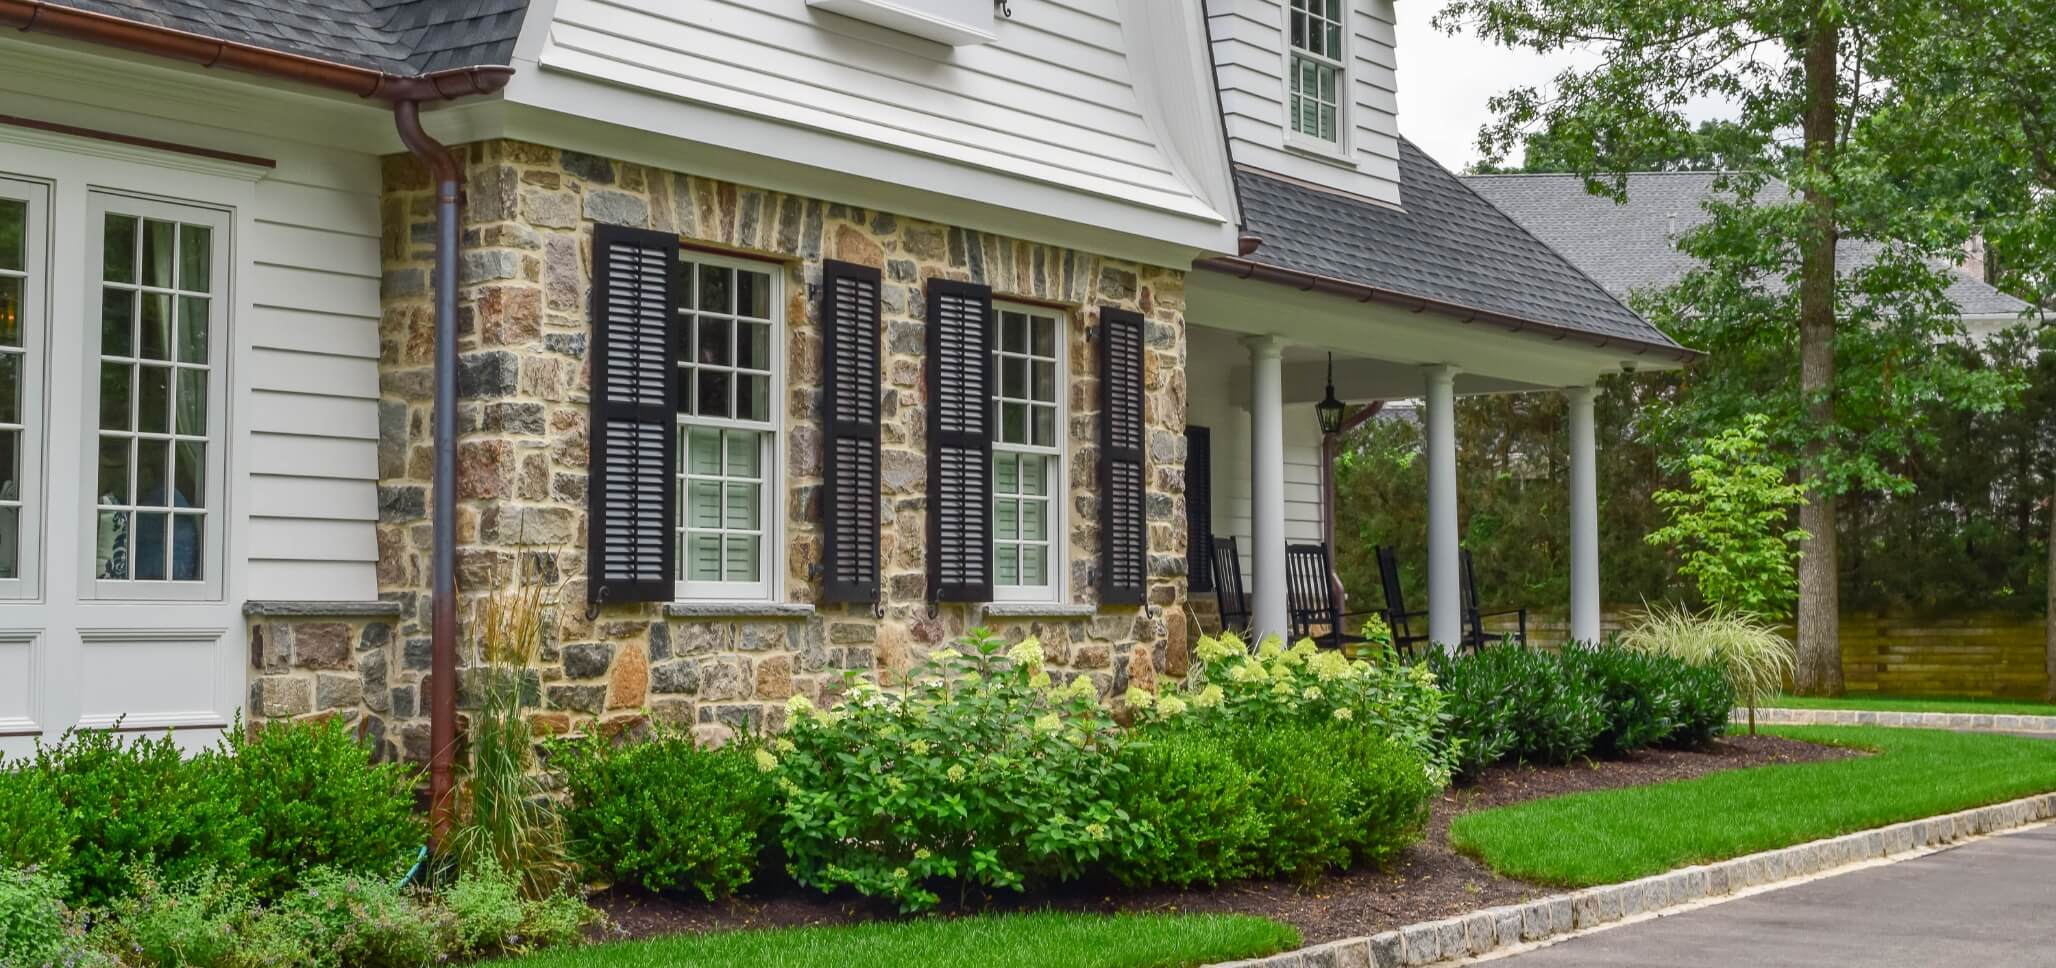
Paving stones are the perfect solution for any homeowner who needs to spruce up their landscape on an affordable budget.
The classic beauty and elegance offered by concrete and brick pavers work well with countless other landscaping, hardscaping and architectural features.
This makes it easy to update your property and increase its value without being required to overhaul everything. Sounds great, right? Before we get ahead of ourselves, though, it’s important to lock down the process of how to lay pavers.
Regardless of whether you’re handling the work as a DIY project or hiring a professional to tackle the job for you, it’s important to know what to expect. It is also recommended that you speak with a contractor before tackling this project alone if you have any doubts or concerns, seeing that problems might arise during installation or you become overwhelmed before completion.
This will ensure that the job gets done right the first time. Read on to learn everything you need to know about laying pavers for patios, driveways and walkways.
How To Lay Pavers In 10 Simple Steps
Step 1: Choose Your Materials
Before anything else, you need to select the right materials for your project. You’ll find that there are many manufacturers of concrete and brick pavers, each of which offer a variety of colors, styles, shapes and patterns.
Be sure to stick with a manufacturer that has a well-developed reputation for offering high quality materials and excellent customer support. This will provide you with the peace of mind that you’re getting the most return on your investment.
Take the time, too, to make truly certain that you’re happy with the specific pavers that you select, as they will become a long-term fixture within your landscape.
Step 2: Establish a Perimeter
Now that you’ve settled on the fabulous paving stones of your dreams, you’re ready to start taking action. We recommend that you work with a partner to mark off the borders of your project area.
Taking care to ensure that your boarders remain equidistant to one another, drive landscaping stakes into the ground every 6″ or so. You can then wrap twine or a similar material tightly around the stakes.
This will give you a better visual image of where you will be working, how much space your completed project will take up and how it will look within the scope of your property.
Step 3: Determine the Proper Depth
The depth required for your project’s base will depend on the nature of the project itself. The more weight that the pavers will need to bear, the deeper the area will need to be.
In the case of a path or walkway that will only be subject to foot traffic, a depth of 4″ – 6″ is desirable. Because patios will experience both foot traffic and loads associated with patio furniture, we recommend a depth of 8″. Driveways, which must handle both foot and vehicular traffic, should have a minimum depth of 10″ – 12″.
Step 4: Excavate and Clear the Area
Once you’ve figured out the appropriate depth for establishing a base layer for your project, it’s time to get your hands dirty and start digging. Some homeowners choose to use a shovel or spade whereas others rent special equipment to remove the dirt.
In either case, be sure that you stay within the bounds of the roped-off area and that you dig to a consistent depth. Clear away any roots, rocks, sticks or other debris that may be in the way and prevent the base from remaining level. Finally, tamp down the soil for a solid finish.
Step 5: Pour Gravel
You’ll need to fill in the cavity that you’ve just finished digging with crushed stone or gravel. Be sure to save approximately 1″ for sand. We recommend that you only pour 1″ – 2″ of gravel at a time before tamping it down firmly.
This will prevent settling and shifting after the pavers have been installed. Continue to repeat the process until all of the gravel has been poured.
Step 6: Pour Sand
A 1″ layer of concrete sand will need to rest at the top of the gravel. The granular nature of the sand is what bonds with the concrete or brick pavers and helps the materials to stay in place. It’s a good idea to rake over the surface of the sand after it has been poured, and compact it down so that it doesn’t settle or move.
Step 7: Lay Pavers
At last, we are ready to discuss how to lay pavers. If you’re working with a rectangular project area, you should start by laying down the pavers that will be situated in the four corners of the patio, walkway or driveway that you are installing.
If the area will be more irregularly shaped, it’s still wise to start with the outermost edges, wherever those may lay. This will help you as you work from the outside, in, to ensure that you establish a strong bond and stay on target with your designs and patterns.
Step 8: Fill In the Joints
In order for your pavers to stay in place, you’ll need to carefully fill in each of the joints between units. This is best done through the use of sand. After pouring sand over the surface of the project area, make use of a push broom in order to work sand into the gaps.
Spray over the area with water in order to help the sand settle into place. You’ll continue this process until the joints are completely filled. Although mason sand will do the trick, you might give some thought to using polymeric sand as it is specifically designed for use between pavers and in mason projects.
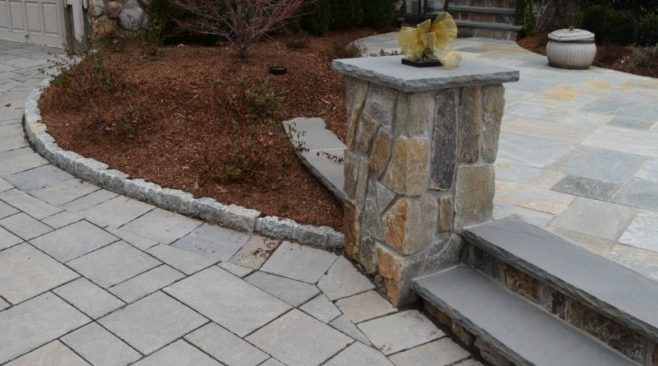
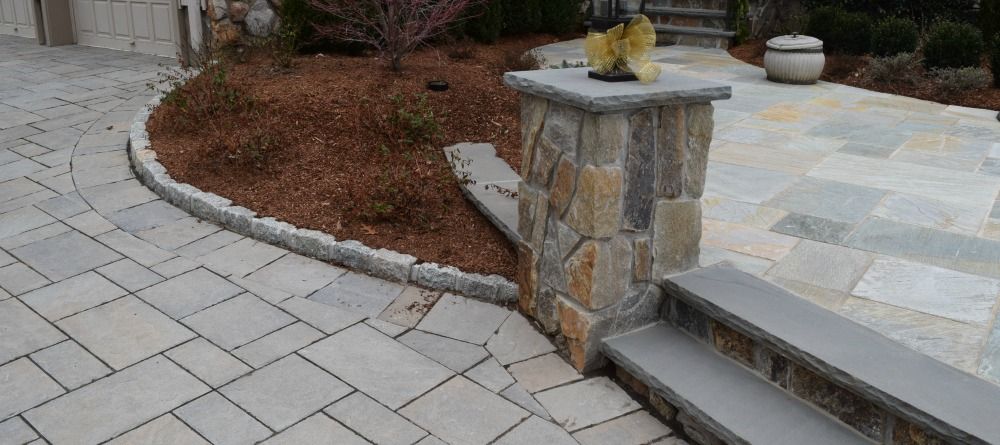
Step 9: Apply Edging
Although it’s certainly not a requirement, we generally recommend that homeowners complete their project by adding an edging material. This helps to make your patio, driveway or walkway really “pop” and adds to its structural integrity.
Step 10: Maintain and Enjoy
One of the greatest things about concrete and brick pavers is that they’re extremely easy to maintain. Generally, you’ll want to have the pavers seal coated after the initial installation. From here, you should re-seal the project area every 2-3 years.
This will prevent staining, fading and discoloration. In the event that something is spilled on your pavers, you can wash it off with a solution of mild soap diluted in water. We also recommend that you sweep dirt, leaves, grass and other debris away from your pavers regularly to prevent any problems with mold or mildew.
By following these steps, you will be able to preserve any lifetime guarantee or warranty that was placed on the pavers by the manufacturer, further protecting your investment. Are you ready to learn more about how to lay pavers? Feel free to reach out to the experts at Braen Supply. We are the leading supplier of concrete and brick pavers throughout NJ and its surrounding areas.
As an authorized dealer for some of the top brands in paving stones, we offer a huge selection of high quality materials at the most competitive rates on the market. Our team of professionals is very familiar with all of the products that we sell, and is qualified to answer any questions you may have. Our pavers can be picked up or bulk delivered to job sites throughout NJ, NY, PA and CT.