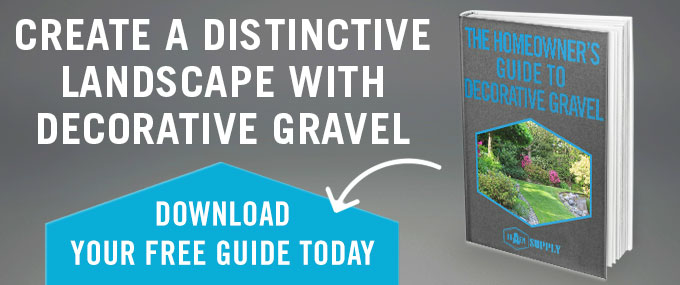
Redesign Your Backyard with These 5 Gravel Landscaping Ideas

When it comes to landscaping, there are few materials as versatile and desirable as gravel. Although you may initially think of gravel as nothing more than small, gray rocks, the aggregate materials is actually manufactured from a wide range of different stone types, including limestone, trap rock, granite and gneiss.

This means that the stone is available in numerous colors, and each type has something special to offer its users. In addition to being beautiful, gravel is purposed throughout the landscape in order to meet a variety of practical functions.

On top of everything else, gravel is extremely affordable and budget-friendly. Although you’re excited to dive in and start upgrading your backyard with gravel right away, you can’t do anything until you have some solid gravel landscaping ideas. Here’s a look at five of our favorites:

1. Design a Unique Patio Space

Although natural stone, poured concrete and concrete pavers are frequently selected for the construction of backyard patios, gravel is growing in its acceptance and popularity. Gravel offers a lot in terms of creative freedom and styling.

The material can easily be poured into any shape or design layout, making it fun and easy for you to establish an outdoor living space that suits your every need and desire. With a variety of different aggregate materials to choose from, you’re sure to find gravel that brings out the best in all of your landscaping features.

This can all be done while still establishing a warm, relaxing and inviting place to share a meal outdoors with your family. Your gravel patio will never become flooded because gravel helps water to percolate naturally and steadily back into the groundwater supply rather than pooling. It’s weather-resistant and it will hold up when subject to sunlight, rain, snow and even hail.

2. Help Your Plants to Thrive

While most people know that bark and wood chips can be used as mulch around flower beds, gardens and other vegetation, many fail to realize that gravel can be used just as effectively! We love the look of gravel as an alternative to traditional mulch.

Whether you select a crushed stone that features jagged or irregular edges, or aggregate that is smooth and round, you’ll fall in love with the stunning textures and dimensions that are created around the plants that you love so much. This material will highlight the different colors of your vegetation and will really make your property stand out from others in the neighborhood.

In addition to looking fantastic, gravel is also known for its ability to promote healthy percolation and drainage. When you combine this talent with its ability to block out excess rays of sunlight, you’re left with a material that is fully capable of regulating soil temperatures and moisture levels so that your plants are able to grow and thrive in optimal conditions.

Because gravel doesn’t break down or decompose over time, you won’t need to change it out regularly as you would with other mulching materials. It also won’t attract critters, insects, or other pests to your backyard. What’s not to love?

3. Enhance Water Features

Gravel looks amazing when it’s placed around the different water features that are so prevalent in NJ backyards. The soft and natural colors that are associated with stone aggregate are a spectacularly beautiful contrast to the shades of blue that are found in water.

Take above-ground swimming pools for instance. You can surround the swimming pool with gravel in order to give it a more permanent and sophisticated appearance while also helping to keep the pool stable and in-place so that you and your family can get the most enjoyment out of it.

Gravel can also be very beautiful when it’s used in and around water fountains or water falls. As the water trickles over and through the rocks, you’ll find yourself soothed and entranced. Those who have ponds in their back yards won’t be disappointed by gravel’s ability to act as a substitute for sand when creating a beach.

Not only is the beautiful gravel soft and comfortable to walk on, but it also will help to prevent shoreline erosion from occurring over time so that you can experience the beauty of the pond in the many years to come. You might also consider using gravel in reflection pools or in the construction of dry river beds which are elegant while promoting excellent drainage for your yard.

4. Surround Your Fire Pit

Fire pits are growing in their popularity throughout NJ and the Tri-State area. The great thing about a fire pit is that it can be enjoyed all throughout the year.

It acts as a focal point or a centerpiece in your backyard. It’s also a place where you and your loved ones can gather on a star-filled night in order to enjoy each other’s company and create memories that will last a lifetime.

You can take your fire pit to the next level by choosing to surround the area with attractive and practical gravel. Gravel of all styles and colors can compliment the beauty of the natural stone or manufactured concrete fire pit of your choosing.

Because gravel is non-combustible and non-heat retaining, you’ll be able to rest assured that you and your family will always be able to make use of your fire pit safely and comfortably. Gravel is a loose-fill material which makes it very easy and affordable to create a circular, rectangular, or even irregularly shaped seating area around the dancing flames, so feel free to use your imagination!

5. Keep Everything Connected

When you’ve got more than one area of your backyard that you love, it’s important to keep everything connected. After all, you want it to be as simple as possible to get from your beautiful patio space to the inviting waters of your swimming pool, and you want to be able to hop out of your swimming pool and walk over to your colorful flower gardens where you can meditate in peace.

We love the look of backyards that use gravel when designing and installing beautiful and functional paths or walkways which work to connect all of the different aspects of the landscape.

Gravel is soft and comfortable to walk on and is very easy and affordable to install and maintain. You’ll continue to fall in love with both the look and feel of your paths.

Where to Buy Gravel in NJ

We’re good for a whole lot more than just killer gravel landscaping ideas. As the largest and most trusted gravel supplier in NJ, we’ve helped countless customers throughout the Tri-State area make their landscaping dreams come true.

We carry a massive inventory of gravel in a variety of sizes, colors and styles depending on your unique needs. Our team of experts is more than happy to discuss your plans with you and to help point out the right type of gravel to get the job done.

All of our materials are available at competitive, wholesale prices so that you can stay on track with your budget. Our gravel can be picked up at your convenience or can be bulk delivered to areas throughout parts of NJ, NY, NYC and PA.

New Call-to-action

Your Guide to Techo-Bloc Installation in NY

Got Techo-Bloc on the brain? NY homeowners love the touch of class and sophistication that beautiful Techo-Bloc products have to offer their landscapes and hardscapes.

Techo-Bloc concrete materials are meticulously designed and engineered to look and feel exactly like natural stone – but at a fraction of the cost. That’s not the only reason people are so crazy about Techo-Bloc, though. Each of the brand’s high quality materials are easy to work with, making for fast and affordable project installations.

Whether you choose to do the work on your own or hire a professional contractor, Techo-Bloc’s easy-to-follow, step-by-step instruction guides make it possible for the work done on time and on budget and we’re going to make it easier for you, still. To make sure that you have the best possible experience throughout the installation process, we’ve put together the following pro tips for handling Techo-Bloc installations in NY.

Common Tips for Techo-Bloc Installations in NY

Techo-Bloc is known for offering great, downloadable instructions for installing their products. Even so, there are a few other things that would be helpful for you to know.

Here’s a look at a few tips for handling the most popular types of Techo-Bloc installations in your area:

  • Laying Pavers and Slabs – Whenever you’re working with Techo-Bloc pavers and slabs, you should start by laying the materials down around the outside edges and then work your way inward. Always make sure to make use of a high quality polymeric sand to bind the pavers together, and use plenty of water to activate the polymers.
  • Building Walls – Techo-Bloc makes the process of installing concrete block walls pretty straightforward and simple. However we do advise that you never exceed the height specifications provided for building a wall, as this can detract from the structural integrity.
  • Constructing Steps – The primary difficulty that people face when constructing Techo-Bloc steps is in determining how many steps will actually need to be installed. We strongly urge you to consult with a trusted professional in order to measure the slope of your yard, to help you determine the appropriate rise and run for the steps to be installed and to figure out exactly how many concrete steps will be needed to make a comfortable, reliable, safe, and attractive staircase.
  • Assembling Fire Features – Techo-Bloc sells all-in-one fire pit and fireplace kits that are very easy to assemble. The key here is to make sure that the area you wish to place the fireplace is suitable for withstanding the weight, and that the foundation is secure.

Tips for Cutting Concrete

In some instances – especially cases where you’re coming up to an end of a row or are creating specific patterns and angles – you’ll find that you’ll need to cut the concrete in order to ensure that the pieces fit properly together. We suggest that you carry out this work in one of two ways.

The first method is to use a hammer and chisel. Here, you’ll need to put in a little bit more elbow grease but you will be able to maintain a pretty high degree of precision throughout the process. This is the best course of action for a “newbie”.

The second option is to use a concrete saw. The saw will cut through the concrete much faster, but those who don’t have experience with tools like these may find that it’s more difficult to maneuver and thereby more difficult to maintain control over the precision of the cut.

We suggest that only more seasoned DIY-ers or professionals go this route. In either case, you’ll first need to measure the exact cut of the concrete paver, slab, block, step, or other material against neighboring materials for a perfect fit.

Next, you’ll need to score the concrete unit. From here, you’ll either chisel or saw the concrete to the correct side. In the case of chiseling, you’ll need to complete several passes before the unwanted pieces will break away.

Regardless of which method you choose, we urge you to take your time so as to avoid making careless mistakes. Breakages and errors most commonly occur with those who try to rush through the work. Finally, always wear safety gloves and follow safety procedures to avoid injury.

Tips for Finding a Supplier

No matter what type of Techo-Bloc project you’re handling, you’re going to need to find a reliable supplier for all of your materials. In addition to the Techo-Bloc products that will be required for the work, you’ll also likely need other construction materials like crushed stone or sand, to act as a base material.

Instead of running back and forth between different vendors, we suggest that you look for a supplier that can provide you with all of the materials you need – all in one location. This means that you’ll need to find a business that not only acts as an authorized Techo-Bloc dealer, but that also manufactures and sells high quality aggregate products.

For best results, we typically advise that you stay local with your hunt. Buying online materials can initially seem like the cheaper route, but you’ll miss out on the opportunity to visually inspect your purchases before making and order and you’ll end up spending more money on shipping and transportation fees in the long run.

Lastly, it’s a good idea to find a company that can not only act as your supplier, but also as your delivery service. After all, you’re going to need to have a means of moving your Techo-Bloc materials from the vendor’s location to your job site. Finding an all-in-one company like this will make your life easier and will likely cut down on your overall expenses.

Tips for Finding a Contractor

Those who don’t feel comfortable installing Techo-Bloc products on their own will need to find an honest, reliable, NY contractor that’s familiar with working with Techo-Bloc.

In addition to looking for companies with positive customer reviews, it’s always wise to talk to your Techo-Bloc supplier to see if they have any leads or connections to reputable contractors that they know are capable of doing great work at fair and reasonable prices.

Installing Techo-Bloc in NY

Braen Supply is the leading name for Techo-Bloc sales and distribution in NY and its surrounding areas. We’re partnered with Techo-Bloc as authorized dealers, enabling us to carry a full inventory of Techo-Bloc products while remaining current and up-to-speed on the latest manufacturer’s instructions and tips for installation and maintenance.

We’re happy to pass along that knowledge to our customers, and to answer any questions they may have. We’ve also developed solid relationships with Techo-Bloc contractors who can step up to the plate and do the work on your behalf, should you decide to go that route.

We always offer the lowest and most competitive prices for Techo-Bloc products. Last, but not least, we offer stellar bulk delivery services throughout parts of NY, including NYC, as well as throughout parts of NJ and PA.


The 6 Stepping Stones to Installing Techo-Bloc Steps in Bergen County

A stone staircase can make a bold statement about you and your property. Unfortunately, natural stone is expensive, and some homeowners find themselves unable to work a project like this into their landscaping budgets. In cases like these, we recommend working with Techo-Bloc products – and you’ll quickly see why!

Techo-Bloc Steps are Perfect for All Properties

Unless you already know that the manufactured Techo-Bloc stairs you’re looking at are engineered from concrete, you’d have no idea that they weren’t comprised of the real thing. The Techo-Bloc designers take pride in creating a product that looks exactly like natural stone, including color, shape and texture.

In other words, you get to grace your property with spectacular stone staircases at a fraction of the cost of natural stone. It gets even better than that, though. Because Techo-Bloc products are manufactured to the highest standard, you can expect that each and every stair riser and tread will be of the same, uniform quality.

While natural stone may feature some chips, cracks or nature-made blemishes, Techo-Bloc stairs will not. And since Techo-Bloc stairs are full color, you can expect the beauty of your steps to last as long as stone – and beyond!

Installing Techo-Bloc Steps: Your Step-by-Step Guide

Now that you’re sold on the idea of using Techo-Bloc stairs throughout your Bergen County property, you’re probably wondering what’s next. Where do you go to find Techo-Bloc products, which are right for your specific needs, and how is a staircase constructed? We’ve got answers to each of your questions in this simple “stepping stone” guide to installing Techo-Bloc steps.

Step 1 – Assess the Project Area

Before you do anything else, you need to think about what you’d like to accomplish with your new Techo-Bloc steps, and how much your property can actually accommodate. For example, will your steps be used to connect multiple levels of a patio, and how many steps will be required?

Or are the steps necessary to make it easier for guests to climb a hill to your front door? This information will play a key role in determining which steps are most desirable and practical for your landscape. Next, you’ll need to figure out how much material will be required, how steep the stairs will be, and how deep the stair treads will be.

Again, this will depend on the elevation change of your property and the size of the area with which you have to work with. Lastly, it’s important that you take the time to evaluate your project area before cutting into the land and installing stairs. Call your local utility provider to make sure that you won’t run into any underground wires, cables, or pipes.

Step 2 – Find a Techo-Bloc Dealer

When it comes to buying Techo-Bloc steps in Bergen County, you’ll find that your options are a bit more limited than if you were buying natural stone. This is because only authorized dealers are able to sell Techo-Bloc products.

Make sure that you take the time to research your options and choose a supplier that has specifically been approved to sell Techo-Bloc materials before making a decision. This will ensure that you don’t end up buying a cheap knockoff or buying from an unauthorized dealer at an inflated cost to you.

If you’re not sure about a supplier, you can check the Techo-Bloc website to confirm whether or not they are an authorized dealer. In addition to finding a company affiliated with Techo-Bloc, it’s also important to narrow your search to your local area. This will eliminate any issues with shipping, transportation or delivery.

Step 3 – Choose Your Perfect Stair Materials

When you visit the dealer of your choice, you’ll be presented with a number of Techo-Bloc products. Which stairs are best for you? York or Venetian? Rocka or Maya?

While part of your decision will be based on aesthetics and personal preferences, you’ll also need to refer back to Step 1. The more flexible your project area is in terms of elevation and depth allowances, the more choices you’ll have.

Step 4 – Riser Installation

Follow product-specific instructions on installing each of your risers. Depending on the block model that you choose for your steps, you may have to install two rows when constructing a riser.

If this is the case, you’ll need to take special care to ensure that connectors are used in the correct position. In either case, make sure that you take the time to thoroughly fill in the spaces behind the riser with stone aggregate and compact before proceeding.

Step 5 – Step Installation

Step modules are only to be installed after the riser row has been secured into place. The joints between the riser and step will need to be staggered. A manufacturer-approved adhesive or mortar will need to be used to secure the steps to the risers.

Step 6 – Seal and Maintain

We recommend that our customers consider completing their Techo-Bloc step installations by applying a coat of sealant to each stair and stair tread. When a seal coat is applied correctly, it can help to add further protection to the covered steps.

This means that your steps will be even more resilient against the howling winds, extreme temperature fluctuations, heavy levels of precipitation, and other acts of Mother Nature that occur so commonly in Bergen County and its surrounding areas. Sealant can also prevent stains from forming as easily and can make it easier to clean your steps.

Finally, a seal coat will lock in the color of your stairs, preventing fading and discoloration. Make sure that you choose a sealant that has been approved for use with Techo-Bloc products. Sealant typically needs to be reapplied every 2-3 years.

DIY vs Contractor

After considering steps required to install Techo-Bloc steps in a Bergen County landscape, it’s important to consider whether you feel as though you’re capable of handling the project on your own or if you’ll need to hire a professional to do the work on your behalf.

We advise that you only consider tackling the job as a do-it-yourself gig if you have experience in landscaping or hardscaping and have completed a similar project in the past. Otherwise, you’ll need to take the time to find a reliable contractor.

After years of selling Techo-Bloc products, we’ve developed relationships with a number of local contractors who have completed spectacular Techo-Bloc installations. We are happy to help you find a company that you can trust and afford.

Buy Techo-Bloc Steps in Bergen County

Ready to install Techo-Bloc steps in your Bergen County property? Braen Supply has all of your needs covered. Feel free to stop by and check out our complete inventory of Techo-Bloc products and to ask any questions you may have.

We’re more than happy to provide you with tips and advice for choosing and installing your stairs. We keep our Techo-Bloc prices low and competitive at all times. Our Techo-Bloc steps can be picked up or bulk delivered to locations throughout Bergen County, all of NJ, NY, NYC and PA.


What Grout Do I Use for Techo-Bloc Porcelain in Northern NJ?

It used to be that northern NJ homeowners really had only one option for beautifying their hardscapes with an alternative to natural stone: concrete. While concrete pavers and slabs are stunning, reliable, affordable and extremely popular, though, some people prefer having the choice to work with porcelain slabs instead.

Porcelain slabs are heavy load bearing, durable and are extremely long-lasting – not to mention sleek, elegant and budget-friendly. What’s not to love? If you’ve been thinking about introducing Techo-Bloc porcelain pavers to your northern NJ property, this is the post for you.

After all, knowing that you like the look and characteristics of a specific type of slab is only half the battle. From here, you’ve got to know how you’d like to arrange the slabs and have a means of keeping the individual units in place.

Which type of grout is right for working with porcelain slabs? Are there differences in how the grout should be applied to porcelain vs concrete? Read on for the answers to these and other important questions.  

Porcelain Slabs and Grout: What You Need to Know

Choosing the right grout for your hardscaping project is a pretty big deal. After you’ve worked so hard to plan the design, layout and specific patterning of your Techo-Bloc porcelain slabs, the last thing you want is for the units to shift out of place.

Not only will this detract from the aesthetic value of your property, but it also has the potential to significantly decrease functionality and create safety hazards. Slabs that have settled or moved out of place, for example, could increase the trip-and-fall potential throughout your hardscape.

Making sure that you install the slabs with the use of a reliable, long-lasting grout will help to prevent problems like these from happening. This will ensure that you’re able to get the most use and enjoyment out of your outdoor living space in the many years ahead. 

The task of selecting the right grout for your Techo-Bloc porcelain slabs, then, should not be taken lightly. After years of acting as an authorized Techo-Bloc dealer, we’ve seen numerous homeowners and contractors make the mistake of choosing the wrong material for the task at hand.

Trying to get by with an unsanded grout, for example, will almost always yield disastrous results. This is because non-sanded grout is only designed to work in extremely small joints. As a general rule, you want to make use of this type of joint adhesive strictly in cases where the joints will be smaller than 1/8″ in width.

In the majority of cases, Techo-Bloc slabs will be spaced further apart, and this will demand a stronger type of grout. An epoxy, on the other hand, is quite strong and reliable, but still might not be the best choice for porcelain slabs.

This is the most expensive joint filling option, and unless you’re able to match the coloring of your porcelain slabs to a T, you could seriously detract from the overall look and beauty of your completed project area. So what do we recommend? When it comes to working with Techo-Bloc porcelain slabs, we offer two recommendations: polymeric stabilizer sand or no grout at all (where applicable).  

Polymeric Sand

Polymeric sand is, by far, the most commonly used grout for Techo-Bloc porcelain slabs throughout northern NJ. This is a specific blend of sand and polymers that, when activated by water, work to harden and hold the porcelain slabs in place.

The polymeric sand is gentle enough that it won’t scratch or damage the surface of the porcelain, and its natural tones and textures will look stunning when contrasted with the colors available from Techo-Bloc’s many lines of porcelain slabs.

Polymeric sand remains efficient and functional for long periods of time, and is very affordable and simple to install and maintain.   

No Grout

Many northern NJ homeowners have fallen in love with the idea of creating paths, walkways, and even patio areas that feature a blend of both Techo-Bloc porcelain slabs and vibrant, green grass.

Instead of installing a solidly paved area, these folks space out the slabs in patterns throughout the grass, creating the look of “blocks” of both grass and porcelain. This is an excellent way to enjoy both a landscape and a hardscape without being required to fill in joints with any type of grout.  

Tips for Introducing Grout to Techo-Bloc Porcelain Slabs

When installing your Techo-Bloc porcelain slabs, you’ll need to fill in the joints as you go. As you lay each slab down, you’ll need to walk on top of them to press them into the sand, and introduce a polymeric stabilizer between units.

After the installation has been completed, you’ll also need to pour polymeric sand on top of the slabs and then work the grout material into the joints with a broom. Be sure to strictly adhere to any manufacturer specifications for working with the polymeric sand.

Finally, avoid the use of a vibrating plate to install the slabs and set them into the polymeric sand. While projects with concrete pavers and slabs often require the use of a vibrating plate, this can actually be damaging to porcelain, so you should never go this route.  

Installing Techo-Bloc Porcelain Slabs in Northern NJ

Ready to get started on your project with Techo-Bloc porcelain slabs? Braen Supply is the leading Techo-Bloc supplier in all of northern NJ and its surrounding areas. We carry a full inventory of Techo-Bloc 20mm porcelain products, including those from the Brave, Etic Pro, Block, Seastone, Sunrock and Trust style families.

Our team of experts will work with you to make sure that you select the right type of porcelain slabs for your home, and will make sure that you walk away with the right type of grout for the installation process.

Our Techo-Bloc slabs and polymeric sand are available at the lowest prices around and can be picked up or bulk delivered to areas throughout NJ, NY, NYC and PA.

How to Build the Perfect Outdoor Kitchen in NJ

Who says kitchens are only good for indoor use? Outdoor kitchens are the latest trend in NJ landscaping, and it isn’t difficult to see why.

Outdoor kitchens instantly provide you with more usable outdoor living space. They make it easy to whip up healthy dinners for your family or to host large parties and get together with your friends and neighbors.

They’re beautiful. They’re fun. Best of all – outdoor kitchens can seriously increase your home’s value. With incentives like that, you almost can’t afford not to move forward with your plans to install a dream outdoor kitchen of your own.

If you’ve been thinking about taking the plunge, we’re here to help. This comprehensive guide will introduce you to the basics of building your perfect outdoor kitchen.

Plan for Intended Usage

Every homeowner’s idea of the “perfect” outdoor kitchen is different. That’s because different people have different needs!

It’s important, then, that you begin by brainstorming how you envision yourself actually making use of your outdoor kitchen. Figure out what you’d like to accomplish with the space and what you’d like to be able to do in it.

For example, you might ask yourself if you prefer an area that’s designed strictly for cooking. Maybe instead, you’d like a fully functional kitchen that will make it easy for you to prepare, cook and clean up after a meal for you and your loved ones.

Next, consider the types of foods you’d like to be able to serve here. Will you only prepare food on a grill, or do you like the idea of having a superb pizza oven for preparing pizzas, roasting vegetables, etc.? What about cold dishes?

Are you okay with running back and forth between your outdoor cooking space and your indoor kitchen to grab salads, drinks and desserts? Would you enjoy the simplicity and convenience of an outdoor, stainless steel refrigerator?

Would an outdoor sink be useful in the food prep and cleanup process? These questions will determine what your outdoor kitchen will need to include in order to satisfy your every need.

Create a Budget

Now that you have a better idea about the types of outdoor kitchen appliances that you’d like to own, it’s time to sit down and establish a budget for your project. At this point, it’s a good idea to start talking to a trusted professional.

A reputable outdoor kitchen appliance supplier can help you meet your goals without breaking the bank. An expert will be able to provide you with advice on which appliances are best for use in an outdoor kitchen.

They’ll be able to advise you against going with cheap, sub-par products that won’t last long or hold up well in the outdoors. They can also prevent you from overspending.

Select a Style

Another important aspect of building a kitchen is designing and creating your own unique style and personality within the space. You’ve got the opportunity to have fun and be creative.

While outdoor kitchen appliances may be somewhat standard in appearance on their own, homeowners can choose concrete wall stone, pavers and countertops that can be uniquely customized. Most homeowners will play off of the look and style of their existing landscape, hardscape or the architectural style of their home.

This means that you’ll need to find a brand of concrete masonry units that offer a wide range of styles and colors. Whether you’re in the market for something very traditional, very modern, or somewhere in-between, you should have your pick of materials – and then some!

Make sure that you select colors and textures that will look beautiful within the scope of the remainder of your property. Also make sure that they can contrast with and compliment any stainless steel outdoor kitchen appliances that you may have selected for your cooking and entertaining space.

Design with Intention

Don’t let the placement or layout of your outdoor kitchen and its appliances be an afterthought. The exact location of your outdoor kitchen in respect to the remainder of your property makes a huge difference in how it can be used and enjoyed.

If you’ve already got outdoor living features, like patio dining areas, swimming pools, fire pits, etc., you’ll need to consider where your kitchen should be situated in relation to these. Many homeowners strive to construct outdoor kitchens that are adjacent to patio and dining spaces so that it’s easy for the cook to interact with guests and serve up food once it’s ready.

Other’s like the idea of sectioning off their outdoor living spaces in order to create the illusion of different “rooms”. Here, you might consider installing a thin wall or even a fire place to act as a divider between two distinct spaces.

We’ve also seen homeowners that want to include a swim-up bar for their swimming pools. The bar may be included with the outdoor kitchen, and therefore the kitchen and its appliances will need to be located next to the pool.

Make sure that you discuss your plans and ideas with a professional to ensure maximum efficiency. Also, always make sure to have the area assessed by a local utility provider to ensure that the kitchen’s location is practical when underground utilities and cables are taken into consideration.

Choose a Single Supplier

One of the smartest things you can do is to find a single, reliable, local supplier that can handle all of your outdoor kitchen masonry and appliance needs. Going to multiple suppliers will make it much more difficult, if not impossible, to find appliances and building materials that actually coordinate with one another for a uniform and cohesive appearance.

You’re also likely to end up spending more money by going this route. Look for a NJ supplier that offers a wide range of products from different brands so that you have plenty of options.

We suggest that you take advantage of the supplier’s knowledge and expertise in order to get the best advice on which appliances and materials work best together in an outdoor kitchen setting.

Contractor vs DIY

If you love handling Do-It-Yourself type projects, you may feel confident in your ability to build your outdoor kitchen. This may even include assembling any pre-packaged appliance kits.

If you have any doubts, though, we strongly recommend that you seek out a professional contractor. This will ensure that your kitchen is as beautiful, functional and valuable as possible.

Building Outdoor Kitchens in NJ

Braen Supply is your one-stop shop for all things outdoor kitchen in NJ. We carry a wide range of outdoor kitchen appliances and building materials from leading brands.

We also offer the lowest prices on all of our products. Talk to us today about picking up your materials or having them bulk delivered to locations throughout parts of NJ, NY, NYC, CT and PA.
New Call-to-action

Where to Buy Outdoor Grilling Accessories in NJ

Truly, is there anything better than grilling outside on a spring, summer, or fall evening? Grilling is healthier and tastier than traditional cooking, it offers easier cleanup and it creates an all-around environment of fun and togetherness for you and your loved ones.

Getting your outdoor grilling space just right, then, should be a top priority for anyone who enjoys spending time cooking outdoors. How does your current grilling situation stack up? If you feel like there’s room for improvement, we’ve got a list of great ideas for accessorizing and upgrading your outdoor grilling space on a budget that works for you.

Start With the Right Grill

Before you can go out and buy grill accessories, you need to have the right grill. Maybe you’ve got an old tripod, charcoal grill that’s been collecting dust for awhile.

You can trust us on the fact that that’s not going to cut it. If you’re really serious about using your outdoor cooking space to grill up healthy and delicious meals for you and your family, we suggest looking for something larger, sturdier and built to last.

Accessorize and Upgrade Your Grilling Area

Now that you’ve got the best grill, you’re ready to start customizing your outdoor cooking space and turning it into something truly special. Consider incorporating the following elements into your outdoor grilling area:

Countertops

Many NJ homeowners find it desirable to either build stunning countertops up around their grill on a separate island, or to build the grill into an all-in-one grill island. We recommend working with beautiful granite slabs for this purpose.

Granite looks absolutely stunning when contrasted against a grill, and it’s also very practical for cooking. The granite isn’t porous and therefore doesn’t tend to retain bacteria from meat and doesn’t stain easily. It’s extremely easy to clean, and it will continue to remain cool and comfortable to the touch even when the grilling area around it becomes very hot.

You might also choose from countertops made from other stone, like limestone, but our top pick for beauty, affordability and practicality is granite. Talk to a professional for more details about this.

Sink

Prep and cook your meals all in the same space. With a beautiful outdoor sink built into your countertops, you’ll find it easy to go from one thing to another with the greatest of ease.

Refrigerator

Stop running back and forth from your outdoor grill to your indoor kitchen in order to get meat, veggies and other items from your refrigerator. Those who are truly dedicated to the idea of cooking outdoors will appreciate the ability to accessorize and enhance their grill’s capabilities by installing a stainless steel outdoor fridge for convenience.

Pizza Oven

Pizza ovens are becoming increasingly popular in NJ outdoor living spaces, and they really are the perfect compliment to your grill. Imagine being able to wow your guests with a freshly made barbecue chicken pizza.

Especially since the chicken was grilled up on your grill and then transferred to the dough, sauce and cheese in your pizza oven. Or you could use the pizza oven to oven-roast vegetables to be served as a side with your mid-rare steaks.

The options are limitless. On top of everything else, a pizza oven just adds an even more sophisticated quality to your outdoor grilling space.

Burners

Sometimes it’s nice to be able to panfry a side dish to accompany your incredible grilling meat selection. For this, we recommend looking for a multi-gas burner system that can be installed directly on top of any neighboring countertops or grill island space.

We also suggest that you look for burners in a color that will match with the grill and any other cooking appliances and accessories to ensure that you have a uniformly beautiful space.

Tips for Finding the Best Grill Accessories Supplier

Now that you know what will work for enhancing your outdoor grilling space, you need to know how to find the right supplier for all of your cool accessories and upgrades. Here are a few tips for finding the right place:

Lifestyle Focused

Sometimes you’ll find a huge chain store or warehouse that sells grills and accessories. You’ll have to sort through a sea of clothes, food and indoor appliances to find what you’re looking for.

These are the stores that sell just a little bit of everything, but aren’t actually focused on anything specific. The problem here is that you won’t find the variety or quality of materials that you deserve for a truly stunning outdoor cooking space.

Also, the sales representatives won’t be as knowledgeable on the subject of outdoor living. Look instead for a supplier that is fully focused on outdoor living and will be able to offer the materials and attention to detail that you need.

One-Stop Shop

Another smart idea is to look for a grilling supplier that can provide an all-in-one solution for your needs and desires.

Instead of going to Store A to buy a grill, Store B to find the right countertop and Store C for an outdoor fridge, make sure that your supplier can sell you all of the accessories that you’d like to see go along with your grill.

Buying from the same place will likely afford you the lowest bill, but it will also make it easier to find accessories that compliment one another, thus increasing value.

Excellent Customer Service

Always insist upon visiting a grilling supplier that offers incredible customer service. You want your outdoor grilling space to be absolutely perfect when you’re done, and that means working with a company that puts your needs and interests first.

You shouldn’t have to compromise your desires because a pushy sales person wants a higher commission. Instead, it’s about piecing together the grill and accessories that work best for your lifestyle and budget.

Buying Grill Accessories in NJ

Braen Supply specializes in outdoor living solutions that will delight you both now and in the many years ahead. Our grills are a great place to start when setting up a point of interest around other accessories.

This sets you up with the perfect opportunity to construct a fully functional outdoor kitchen and dining space that will enhance your ability to enjoy your time with friends and family while also increasing the value of your home. No matter how big or small you wish to go with your plans, you’ll find everything you need to create a custom space that makes sense for your individual needs.

We’re here to help you make decisions about constructing your perfect kitchen and to answer any questions you may have. Our grills and grilling accessories are always available at the lowest and most competitive prices around. Talk to one of our grilling experts to get started on your project today.

New Call-to-action

Ice Melt by the Pallet: Determine the Right Amount of Material You Need

Every NJ resident finds themselves in need of ice melt throughout the winter months. Despite knowing that they’re going to rely on these types of materials throughout the season, though, many people fail to plan ahead correctly.

You’d be amazed by the number of NJ home and business owners that have no idea how much ice melt or rock salt to purchase and are therefore unable to properly stock up or take advantage of bulk savings by purchasing ice melt by the pallet.

Don’t become another startling statistic! Our aim with this post is to educate readers like you on how to accurately calculate your property’s rock salt needs, how to determine whether you’d benefit from buying ice melt by the pallet and how to store your winter stockpile.

The Importance of Planning Ahead

You may think that you have all the time in the world to get ready for winter, but the fact is that it’s just around the corner. Being ready to protect your property against the threat of snow and ice before the first storm of the season hits, will make your life a lot simpler.

After all, do you really want to go out and fight the crowds for rock salt and ice melt on a frigidly cold day when the snow is falling heavily? And what if you brave those conditions only to find that all of the local stores are sold out of ice melting materials?

It’s safer and more convenient to know what you need in advance and have it on hand during your hour of need. This doesn’t mean that you should just go out and purchase a random quantity of ice melt, based off of what you “think” you might need.

Buying too much or too little ice melt could create even bigger headaches. Obviously, having too much rock salt on hand will cause you to overspend on materials and may even create problems with inadequate storage.

Purchasing too little material, on the other hand, will leave you skimping on the amount of ice melt that you spread across your property, thus decreasing effectiveness. You will end up running out of material before the season is through and will either have to order an additional supply, or deal with the consequences of the stores having run out of ice melt.

You could even end up overspending by missing out on the opportunity to get everything you need all at once, thus taking advantage of bulk prices by purchasing ice melt by the pallet. Knowing what you need ahead of time, then, is the key to having the most positive experience with ice melt this winter.

Calculating Your Ice Melt Needs

Figuring out exactly how much rock salt or ice melt to purchase for your property is not as complicated as you may think. You’ll need to start off by measuring the length and width of your driveway, sidewalk, patio, or other coverage area in feet.

By multiplying the length and width of the coverage area, you’ll see how many square feet of ground will need to be covered with an ice melting product. Although you’ll find that the numbers may vary by manufacturer and brand, the average amount of ice melt that should be applied to a surface per square foot is 3.1 pounds.

Therefore, you’ll need to multiply the square feet of your coverage area by 3.1 in order to reveal the total number of pounds of ice melt needed for your property. Because most bags of rock salt contain 50 pounds, you’ll then need to divide the total number of pounds required by 50. This will tell you how many bags of ice melt to buy.

As an example, let’s say you have a 200 square foot driveway. 200 x 3.1 pounds of ice melt = 620 pounds of rock salt required. 620 pounds / 50 pound bags = 12.4 bags of ice melt needed.

Keep in mind that this equation is set to determine how much ice melt you’ll need per snowfall or winter storm. You’ll need to look at the average days of precipitation that occur in your area throughout the winter months in previous years, as well as consult the forecast for the coming season in order to determine how this will affect your total purchase order.

If, for example, your area typically experiences 10 days of precipitation during the winter, you’ll need to multiply the number of bags required by 10. In the case of our previous example, you’d take 12.4 bags x 10 = 124 bags of ice melt needed for the season.

Should You Buy Ice Melt by the Pallet?

Once you know how many bags of ice melt you’ll need, you should be able to accurately determine whether or not buying ice melt by the pallet is the right move for you. Although the numbers may vary based upon the brand or the supplier, you’ll find that, as a rule, a pallet of ice melt is comprised of 49 individual bags.

Obviously, if you require fewer bags than this in order to accommodate your needs, there’s no need to make a pallet order. If you’re pretty close to the cusp, though, you might want to give some thought to talking with your neighbors.

By making the decision to go in on a bulk order together, you’ll both be able to take advantage of significantly reduced prices. Depending on the brand, you could end up saving a few dollars per bag which can really add up.

Properly Storing Ice Melt by the Pallet

Buying ice melt by the pallet and stocking up in advance won’t do you any good if you don’t store the materials properly. When exposed to extreme cold, the ice melt will tend to clump together and become ineffective.

When exposed to water or moisture, the ice melt will activate, rendering it useless for future events. It’s important, then, that you take measures to ensure that your ice melting materials will be stored in a space that will remain at or above freezing temperatures.

Make sure that the materials are kept off of the floors. We also recommend that you consider keeping the ice melt in sealed containers, or covered with a water-resistant tarp for added protection.

Buying Ice Melt by the Pallet in NJ

If you’ve got big ice melting needs, Braen Supply has you covered. As the leading supplier of ice melting products throughout NJ and surrounding areas, we sell a wide variety of ice melt by the pallet.

You’ll find products that are designed to melt snow and ice extremely fast, be safer for pets, children, the environment and prevent damage to concrete. Our team of experts is happy to discuss your specific needs and help you find the ice melt that’s right for you.

We offer fair and competitive pricing on ice melt by the pallet so that you can get through the winter on a budget you can afford. We also sell multiple pallets by the truckload. Talk to an expert about picking up a pallet of ice melt or having a bulk order delivered to locations throughout parts of NJ, NY, NYC and PA.

Rock Salt Buying Guide

Rock Salt in Bulk: How Much Do You Need This Year?

Buying rock salt in bulk is the way to go. When you’re able to order bulk quantities of ice melting materials, you’ll be able to save a significant amount of money while enjoying the peace of mind that all of your needs will be taken care of throughout the entire winter season.

That is, of course, if you were careful when calculating your need for rock salt. NJ and its surrounding areas are known for extremely cold winters and regular precipitation. This means you need to be ready for whatever Mother Nature throws your way – no matter how often she strikes.

How confident are you in your ability to calculate how much rock salt you’ll need to order to get you through the entire winter? This post will walk you through the process of buying rock salt in bulk.

The Importance of Stocking Up

Stocking up on bulk quantities of rock salt is a good idea for several reasons. First, it will help you to save a lot of money per bag, and a lot more money over time.

Secondly, it will make sure that your needs are covered no matter what happens this winter or how long the winter drags on.

While others are forced out into the storm to buy rock salt at the last minute or are stuck without rock salt when stores run out, you can remain comfortably at home with the knowledge that your family is totally covered.

Calculating Rock Salt Needs Per Snowfall

Figuring out how much rock salt you’re going to need to get you through each snowfall or period of precipitation can seem confusing and overwhelming – until you know what’s required of you. In reality, determining how much material you’ll need to protect you against snow and ice is really quite basic and will require minimal effort and mathematical skill.

First, you’ll need to work with a partner to measure your different coverage areas. Typically, NJ homeowners will need to use rock salt on their driveways, front sidewalks, in courtyards and around patios.

Make sure that you measure both the length and the width of your coverage areas to determine the total square footage that will need to be covered with rock salt or other ice melting materials. Here’s where your basic math skills will come into play.

Take the square footage of your coverage areas and multiply it by 3.1. 3.1 is the average amount of pounds of rock salt that a manufacturer will suggest using per square foot of your driveway. In other words, this number (square footage x 3.1) will tell you how many total pounds of rock salt will be needed to take care of your entire property.

This number on its own isn’t good enough for our purposes, though. You need to know how many bags of rock salt you’ll need to invest in. Most bags of rock salt weigh 50 pounds.

This means that you’ll need to divide the total pounds of rock salt required by 50 in order to see how many bags you should order. Take a look at the amount of bags that you’ll need to cover your property.

Keep in mind, first, that this number will only cover you for one or two snowfalls, depending on how closely they fall together. This is because rock salt is generally only effective for 24 hours. You will need to plan on purchasing enough to cover you for multiple storms throughout the winter season.

Keep in mind, too that suppliers generally sell their rock salt by the bag, pallet or truckload. You’ll find that the average is 48 bags to a pallet and 18 pallets to a truckload. If you need more than 48 bags of rock salt to cover your needs, then, you’ll be best served by purchasing your materials in bulk.

Anticipating Local Weather Patterns

As mentioned previously, you’ll need to buy enough rock salt to take care of you throughout multiple weather storms. Typically, an NJ winter experiences 30 or more days of precipitation throughout the winter months.

Be aware of the temperatures to determine when freezing weather will cause this precipitation to freeze and create problems with snow and ice that will need to be addressed by the use of rock salt.

Proper Usage

Throughout the years, we’ve seen it all. Some of our customers come in complaining that their rock salt isn’t working properly and it’s discovered that they weren’t applying enough material to their paved surfaces.

Others will become frustrated that they’re having to buy more rock salt than they originally anticipated and it’s found that they were over-spreading the ice melt throughout their properties. Either case can be very irritating and and detract from your user experience.

It’s important, then, that you take the time to review manufacturer instructions before working with your rock salt or other ice melting product. The manufacturer will tell you exactly how much material should be spread per square foot (or other unit of measurement) across your driveway, sidewalk or other surface.

While we use 3.1 pounds per square foot as a general rule of thumb, this is not an exact science and you will need to make sure that this is the appropriate quality for the type of material you’ve chosen to work with. Remember, too, that calculations like these are based upon the assumption that the paved surface has already been shoveled and cleared of snow.

If you haven’t taken this step, more ice melt will be required. Knowing this will help you to maximize your usage of your bulk supply of rock salt so that there are no surprises after you’ve done your calculations.

Proper Storage

Stocking up on bulk quantities of rock salt won’t do you an ounce of good if you don’t store your materials properly. Each year, homeowners accidentally cause damage to their rock salt and deicing products because of improper storage tactics.

Remember that, in order to remain effective, rock salt needs to be kept in an area where temperatures won’t dip below freezing. In addition to this, they need to be kept free from any exposure to moisture.

This means that you should never store rock salt on the floor of a garage or shed where melting snow or ice from outside could flow through cracks or under doorways.

It’s best to keep the rock salt up off of the floor. You may even consider sealing it inside of containers, like empty garbage cans, wherever possible.

Where to Buy Rock Salt in Bulk in NJ

Braen Supply is the best place to go for all of your rock salt and ice melting needs. We sell rock salt in bulk at low, competitive, wholesale rates in order to accommodate our customers.

Our rock salt can be purchased by the bag, but we encourage you to consider buying bulk quantities by the pallet or by the truckload. If you’re not sure how much to purchase, our team of experts is more than happy to help you perform the necessary calculations.

Our rock salt and other de-icing products can be picked up at your convenience or can be bulk delivered to locations throughout parts of NJ, NY, NYC and PA.


Rock Salt Buying Guide

What Do I Need to Install Techo-Bloc Pavers in NJ?

Congratulations! You’ve made the decision to move forward with plans to construct your dream hardscape by installing Techo-Bloc pavers.

Techo-Bloc is known for offering high quality, durable and absolutely stunning concrete pavers that look exactly like natural stone at a fraction of the cost. Techo-Bloc pavers are also recognized for being easy to work with and install.

In order to successfully install the pavers on your own, though, you need to know the proper steps to take and to have all of the necessary tools and equipment on hand. The purpose of this post is to make sure that you’re fully prepared for the undertaking.

Everything You Need to Install Techo-Bloc Pavers

Here’s a comprehensive list of the things you’ll need in order to complete a Techo-Bloc paver installation in NJ without a hitch:

Installation Guide

One of the great things about Techo-Bloc is that it provides complete instructional guides on each of its many product offerings. These instructional guides are easy to find and download on the Techo-Bloc site, and further tips, advice and instructions can be found in our blog or by talking to one of our experts.

The Stamp of Approval

Before you can take any further steps to installing your Techo-Bloc pavers, you’ll need to schedule a time for your local utility provider to come out and assess your property. They will let you know if there are any underground pipes, cables or other utilities that will need to be avoided.

The Perfect Pavers

Because Techo-Bloc pavers are so long-lasting and durable, it’s important that you take the time to pick concrete pavers that you will continue to love throughout the years. Visit your local Techo-Bloc dealer to see real-life examples of the types of pavers that are offered or to request samples to see how the manufactured stone will look in comparison to other landscaping and architectural features throughout your property.

Techo-Bloc Kit

Once you’ve settled on your perfect concrete pavers, request an installation kit from your supplier. These comprehensive kits will come with all the pavers and related materials required to easily install the units, as well as instructions for creating specific designs and patterns throughout the installation process. Most customers agree that these kits are very easy to use and work with.

Excavation Equipment

Regardless of whether you’re installing a driveway, a patio, a walkway or other surface, you’ll need to excavate the project area prior to doing any further work. Make sure that you consult with an expert to determine the exact, required depth for the work.

For smaller projects, you may be able to get by with a shovel or spade, but the majority of larger undertakings require the use of heavy-duty excavators. This may mean that you need to budget some extra cash to rent special equipment.

Grading Equipment

As you consult your Techo-Bloc installation guide, you’ll notice that the manufacturer specifies certain grade or slope increments that must be adhered to for successful project completion.

Because most of our customers are unfamiliar with grading, we generally recommend that you consider purchasing or renting equipment that can help you to accurately grade the project area.

Vibrating Plate

Each layer of your base and subbase must be firmly compacted for project success. Doing this by hand can be extremely taxing, so considering renting a vibrating plate.

Crushed Stone

Crushed stone is an essential component to any hardscaping project, and it’s the most reliable and affordable material that can be used as a base for Techo-Bloc concrete pavers. Make sure to consult your installation guide to see whether or not specificly sized stones are necessary. Talk with your supplier or make use of a reliable online materials calculator to determine how much crushed stone to buy.

Spray Hose

Moisture can be very helpful throughout the compaction process. Because of this, we urge our customers to spray down crushed stone and other base materials with a hose prior to compaction. This will make the process much faster and easier.

Bedding Sand

Sand is ideal for creating a bedding for concrete, Techo-Bloc pavers. The pavers will lock into place for a reliable project area. Talk to your supplier about which type of sand to use for bedding.

Concrete Saw

Many homeowners like the look of symmetrical, square or rectangular concrete pavers. There are many others, though, who prefer irregular cuts. Even if you are sticking with squares, you may find that one or more stones don’t quite fit into your pattern.

These are all valid reasons for picking up a concrete saw. These tools make it easy to cut and shape the concrete pavers so that they work within the scope of your project.

Mortar

Obviously, you need reliable mortars to hold the pavers together. We urge you to consult manufacturer specifications to make sure that the mortar is compatible with the stones and will keep your finished project in place, even when exposed to NJ weather.

Broom

You’ll need a broom to sweep off any remaining sand or mortar and clean the pavers.

Sealant

Although it’s not required, both ourselves and Techo-Bloc recommend that users consider finishing their project out by applying a sealcoat to the newly installed pavers. The right sealcoat can help to further protect the concrete pavers against the effects of the elements, scraping, scratching or staining. Make sure that you follow manufacturer instructions when choosing and using a sealant.

Safety Equipment

Because of the high power tools and equipment used throughout the installation, it’s a good idea to invest in safety equipment. Wear gloves when using shovels, and always use safety goggles and a hard hat when using a concrete saw or large, heavy duty excavation equipment.

Need a Contractor?

After considering the different skills and tools required to complete the work, you may decide that you’d rather hire a professional to handle the installation for you. If this is the case, it’s important that you are selective and take the time to find a contractor that’s familiar with Techo-Bloc products.

Throughout the years we’ve worked with numerous local contractors and have developed a sense for “who’s who” in the world of landscaping. We’re more than happy to point you in the direction of a reliable, honest and affordable contractor that will be able to handle the installation quickly and efficiently.

Buying Techo-Bloc Pavers in NJ

As an authorized Techo-Bloc dealer, Braen Supply is the largest, most trusted Techo-Bloc supplier throughout NJ and its surrounding areas. We carry a complete inventory of Techo-Bloc products that can be viewed at our stone yard.

We’re happy to discuss your goals and help you to choose the best concrete pavers for your needs. We can also provide you with detailed advice on the installation process and will make sure that you walk away with all of the tools and equipment required to pull off your project successfully and affordably.

Our Techo-Bloc pavers and related installation tools and equipment can be picked up at your convenience or can be bulk delivered to locations throughout NJ, NY, NYC and PC.


A Style Guide to Techo-Bloc Patterns in NJ

When designing a beautiful hardscape, choosing the right product is only half the battle. While you may know that Techo-Bloc crafts the highest quality and most visually appealing manufactured pavers, slabs and masonry units on the market, simply ordering the pieces isn’t enough to create a stunning outdoor living space – you’ve got to also know how to arrange and lay each unit into a pattern that reflects your personality and sense of style.

Unless you’re a creative type, though, this can sound like a daunting task. After all, arranging hundreds and thousands of individual, concrete stones just may not come naturally to you. That’s okay! You don’t have to be a design expert or an artistic genius in order to get your Techo-Bloc materials laid out “just right”.

Techo-Bloc knows and understands that creating beautiful patterns and layouts just isn’t everyone’s forte, and as such, they have come up with numerous patterns for you to choose from. Now all you need to do is figure out which patterns best suit you, your Techo-Bloc products, and your home.

Your Guide to Techo-Bloc Patterns

Random

A randomized layout of Techo-Bloc materials can be a lot of fun to install and to look at. As you look at the different product lines available through Techo-Bloc, you’ll notice that some are better suited to this arrangement than other, so choose wisely.

You’ll enjoy a lot of freedom in the placement of each individual unit, and this particular “pattern” will create a great deal of visual interest, intrigue and texture for you and your guests to enjoy.

You’ll continuously fall in love with the look and feel of your completed project area, as there’s always something new to notice and experience.

Linear

Linear patterns repeat themselves row after row. Consider this example: In the first row of your project space, you create a pattern that consists of 4 different paver types: 1-A large rectangle, 2-A small Square, 3-A large square, 4 – A small rectangle.

This pattern would then start again and repeat until the end of the row. In row 2, the pattern might continue in a way that is laid out exactly beneath the first row, or it might be staggered.

Staggering the pattern is a great way to achieve a uniform look and feel across the board without becoming boring. In other words, it adds to the overall depth and dimension of the area and creates more visual interest to stimulate the imagination.

Here, you might stagger out the pattern by one or two blocks. While you’ll have some freedom to make choices here, you’ll find That Techo-Bloc will offer up numerous pre-designed options for you to choose from in order to make your life simpler.

Modular

Modular patterns are much more complex than linear patterns and the original pattern will cover multiple rows. The pattern will then spread out and repeat itself in a way that almost mimics a jigsaw puzzle as the different patterns must fit into one another as they continue onward.

Because this requires a great deal of precision and attention to detail, we strongly suggest that you find a style of Techo-Bloc pavers or slabs that lend themselves to this type of design and then work carefully to follow pre-determined design patterns rather than trying to come up with a design scheme on your own.

Parquet

Like modular patterns, parquet patterns are more complex than linear designs and may extend into multiple rows, creating unique shapes and designs. The hallmark of parquet patterns is that they are comprised of shorter, smaller concrete blocks or stones that are laid out into geometrically pleasing designs to inspire the viewer.

These patterns are always angular in nature, which captures interest as the eye follows the pattern from one side of the complete project area to the other. Look for the different Techo-Bloc product lines that are compatible with parquet patterns and choose from the many layouts available.

Herringbone

The herringbone pattern is a variation of parquet and is based upon the arrangement of rectangular units in order to establish strong, angular, geometric shapes. The units are often patterned in a way that moves perpendicular and outward from one another.

This almost creates a zigzagged pattern. In fact, the name of the pattern comes from the idea that the finished design resembles the bones of a herring fish.

The end result is an absolutely dazzling space that will please you and your guests in the years to come. Techo-Bloc offers simple-to-follow patterns for installation.

Shapes and Styles

As you take a closer look at each pattern type, you’ll notice that the different layouts are comprised of a makeup of concrete pavers, slabs and stones that are shaped and sized differently. Some patterns, for example, demand that all Techo-Bloc units are of uniform dimensions, being comprised of 100% square units of a specific size.

In other instances, the pattern might make use of 75% square Techo-Bloc pavers and 25% rectangular pieces (or vise versa). Some might demand irregularly shaped units while others may use squares of varying sizes.

It’s important to understand the different shapes, sizes and styles that are required in order to meet the demands of a specific pattern as this will influence the style of pavers or blocks that you’re able to order and in what quantity.

Laying Out Techo-Bloc Patterns

The great thing about Techo-Bloc is that it provides detailed and easy-to-follow instruction manuals for homeowners who wish to install their Techo-Bloc products on their own. You’ll find guides to laying out the Techo-Bloc units in the correct fashion to mirror specific designs and patterns.

This will ensure that you achieve the precise look and style that you have been dreaming of. By taking the time to work with the instructions and putting in a little elbow grease, you’ll complete a stunning Techo-Bloc project that will blow away your friends and neighbors in no time.

While the installation guides are user-friendly, we do find that some of our customers prefer to hire a professional. If you believe that a contractor would be better suited to laying out your Techo-Bloc materials in the desired pattern, we’re happy to point you in the right direction.

We’ve worked with numerous local contractors throughout the year and can connect you with the most reliable companies that have the most experience with Techo-Bloc.

Buying Techo-Bloc Products in NJ

As an authorized Techo-Bloc dealer, Braen Supply is the leading supplier of Techo-Bloc products throughout NJ. We offer a full inventory of Techo-Bloc pavers, slabs and concrete masonry products to suit a wide range of customer styles and demands.

Each Techo-Bloc product can be arranged into different pattern variations, depending on your unique desires. We’re happy to help you determine which style of Techo-Bloc is right for your home, and which pattern will work best for your needs.

You’ll find that all of our Techo-Bloc products are available at competitive, affordable prices and can be picked up or bulk delivered to job sites throughout parts of NJ, NY, NYC and PA.